The Ultimate Guide for Beginner Photographers
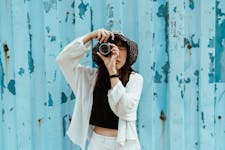
You don’t need a fancy camera to take great photos. All you need is some knowledge.
After all, Edward Steichen, one of history’s most well-known photographers, once borrowed an inexpensive Kodak camera from a waiter at his hotel while traveling in Greece—and made gorgeous pictures in the process.
Similarly, Andy Warhol preferred the Polaroid Big Shot, an instant camera priced at $19.95—a deal even by the standards of the day.
“Some beginners who take great pictures are reluctant to think of themselves as photographers simply because they don’t have ‘real’ cameras,” Kim Beil, an art historian and the author of the celebrated book Good Pictures: A History of Popular Photography, tells us. “As The New York Times photographer James Estrin has written, ‘The photographer takes the picture, not the equipment. Few people care what kind of typewriter Hemingway used.’”
If it’s not the camera that makes the photo, what separates good pictures from all the rest?
The answer to that question is subjective, but it often boils down to a few key elements, including composition, exposure (light), focus, depth of field, motion blur, texture (grain), and editing. In this complete guide to photography, we’ll explain all these crucial concepts, and how you can use them to create better pictures.
Maria Orlova uses moments of symmetry and contrast to create a dynamic portrait.
Photo by Maria Orlova · View Photo
Start with inspiration
Before you even pick up a camera, it can help to consume and study works by the masters. A good place to start is with photography magazines like Aperture, The British Journal of Photography, or GUP Magazine.
For tutorials and ideas, you can browse dedicated photography websites like Fstoppers, PetaPixel, or SLR Lounge. In addition to creative workshops, SLR Lounge also has a truly invaluable photography glossary that's well worth bookmarking for the next time you need to look up an unfamiliar term.
Instagram feeds like Everyday Everywhere, Street Photography International, and Feature Shoot also contain a wealth of inspiration.
From there, you can home in on specific artists you admire. If you’re a street photographer, that might mean perusing the work of Robert Frank, Garry Winogrand, and Diane Arbus. If you’re a fine artist, maybe it means studying up on Alfred Stieglitz, Edward Steichen, and Julia Margaret Cameron. Cast your net wide, and stay open to new ideas.
“Looking at pictures is the most important practice for beginning photographers, as well as established artists,” Kim Beil says. “Look at everything, from advertisements and art to fashion, food photography, and photojournalism. As much as I love Instagram, serious photographers must also seek out other ways of accessing images. You should look at things beyond what is recommended to you by an algorithm. Go to exhibitions, if you can, or study photobooks.
“The next step is just as important. Try to identify what it is that you like (or don’t like) about these pictures. First, describe what you see in them, especially how they are organized. How does the photographer use space in relationship to the frame? How does the photographer place things in relationship to each other? What are the dominant colors of the image and how do they relate to each other? You can ask the same questions of a picture, no matter what its subject matter is.
“Finally, as practice, try to remake the art you admire most, so you can get the feeling of making it into your body. What angle of view is necessary? Where is the lighting coming from? What kind of lens do you need to compress or frame the image in exactly this way?” It’s not copying; it’s learning from those who came before us.
Rok Romih uses the rule of thirds, motion blur, and tonal range to create a compelling image.
Photo by Rok Romih · View Photo
The principles of composition
Composition in photography, or the arrangement of objects within the frame, is integral to creating an aesthetically pleasing image and guiding the eye throughout a scene. You can use composition to catch our attention, tell a story, or achieve a sense of balance and harmony. Regardless of your subject, your composition will tell people where to look, often evoking a set of emotions or feelings in the process.
Throughout the generations, photographers have gone to great lengths to refine their compositions. In the 1930s, for instance, the famous New York photographer Berenice Abbott became enthralled with a new subject: the city’s architecture. Not one to be satisfied with ordinary, everyday views, she planned her compositions meticulously. Although she was afraid of heights, she often found herself climbing stairwells and rooftops, her bulky equipment in hand, to capture the perfect vantage point.
While few photos will require hanging out of an upper floor of a Manhattan skyscraper, great compositions often require photographers to get creative, change their perspectives, or experiment with unusual angles. To kick off our discussion of the guiding principles of photography, we’ll delve into some of the key components of composition.
Maryann Kariuki finds a symmetrical composition in ancient architecture.
Photo by Maryann Kariuki · View Photo
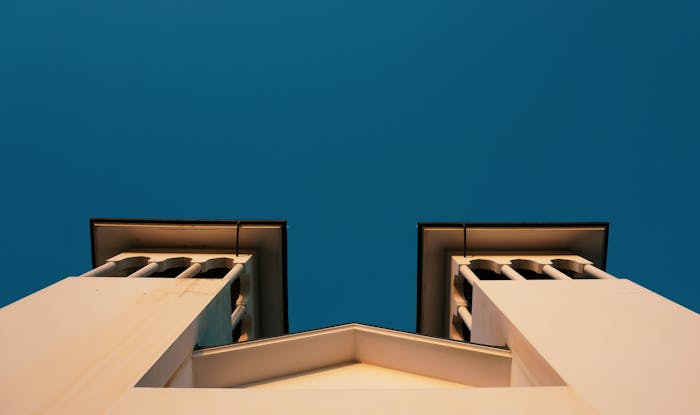
Balance
A “balanced” composition simply describes an image where both sides carry equal visual weight. A symmetrical composition is perhaps the most obvious way to achieve harmony throughout an image—and while most photographs aren’t perfectly symmetrical, many come close, especially in the architectural world. Portraits are often symmetrical as well because of the shape of the human face.

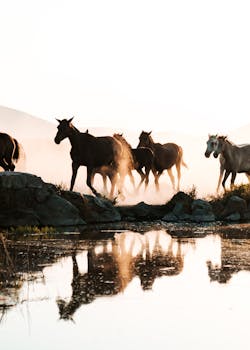
In this picture by Octoptimist, created at dawn, the bright portion of the image on the right draws the eye, but it’s balanced by the saturated red spot as well as the human figure emerging from the shadows.
Photo by Ekaterina Astakhova · View Photo
At the same time, a photograph doesn’t have to be symmetrical to be balanced. Most photographs use what’s called “asymmetrical balance” to create harmony. In that case, the two halves of the image would not be identical, but they would carry equal visual weight, as determined by the size, number, color, and positioning of the objects within the frame.

In this photo by Tomas Anunziata, the edge of the lone tree falls across the vertical thirds line on the left, while the tops of the mountains hit the upper horizontal thirds line.
Photo by Tomas Anunziata · View Photo
The rule of thirds
Many beginning photographers start by putting their main subject right in the center of the frame. That’s not necessarily a mistake, but it doesn’t always produce the most interesting composition either. This is where the rule of thirds comes in: imagine a grid dividing your frame into nine equal parts, with two evenly spaced horizontal and vertical lines running across it. Instead of placing your subject in the center, put it along one of those lines or their points of intersection.
You’ll find these “rule of thirds” compositions all over the place once you start looking for them, including within famous photos by everyone from Alfred Stieglitz to Philippe Halsman. Most cameras today even come with a grid overlay to help with the process, though with practice it’s likely to become second nature.

Brady Knoll uses footsteps in the sand to lead the eye toward the person in the distance.
Photo by Brady Knoll · View Photo
Leading lines
Photographers can also use leading lines to guide the viewer’s eye. A leading line is any line, curved or straight, that runs through the frame and toward the main subject. Common leading lines include rivers, railroads, power lines, stairs, and more. Leading paths, in contrast to leading lines, are used to draw our gaze into the horizon, rather than the subject of the photo; you’ll find this motif often in photos of the open road.

Josh Hild creates the illusion of depth in the streets of Minneapolis by using foreground, background, and middle-ground elements.
Photo by Josh Hild · View Photo
Depth
Photographs are two-dimensional, but they’re not always flat. In genres like landscape and street photography, in particular, creating the illusion of depth is as simple as incorporating a foreground, middle-ground, and background. Look for objects of interest in front of and behind your subject, and move around to incorporate them into your frame. If you can use leading lines to help the eye navigate these layers, even better.

Julia Volk uses a clever “frame with a frame” or “sub-framing” technique to draw attention to a fascinating view.
Photo by Julia Volk · View Photo
Further techniques to improve composition
Photographers use a number of techniques to enhance composition, add depth, and create interest, including using a “frame within a frame” or simply cropping or changing from portrait to landscape orientation. These techniques take practice, and they can often be used together as needed.
Exposure and controlling light
One of the most common mistakes beginner photographers make, whether they’re using a film camera or a mobile phone, boils down to exposure: either the photo is too dark (underexposed) or too light (overexposed). Ideally, you want to stay in between those two extremes for a correct exposure; that way, you can make out all the important details of the image, from the shadows to the highlights.
Since the dawn of the camera, photographers have sought the perfect exposure. In the 1930s, the photographer Edward Weston regularly spent days in his studio agonizing over how to light a single subject, whether it was a seashell or a pepper from the grocery store. He devoted long hours to experimenting with different backgrounds and natural light, tweaking his settings over and over again until he got the result he wanted.
In many ways, today’s cameras work similarly to those in the days of film, albeit with more features. The photographer still controls the exposure of an image by manipulating three main settings: aperture, shutter speed, and ISO. Together, these settings—known as the “exposure triangle”—determine whether your photo is underexposed, overexposed, or properly exposed. Here’s what you need to know about all three.
Aperture settings
Lenses have an “iris” that opens and constricts to allow in more or less light, similar to the human eye. You control the size of that opening through your lens’s aperture, which is measured in f-stops on your camera, where you’ll find values ranging from f/1.4, f/2.0, f/2.8, f/4, f/5.6, f/8, f/11, f/16, etc. Each of those numbers represents an aperture value or the size of your lens’s opening.
F/1.4 is wide-open and lets in a lot of light; f/2.0 lets in half as much light, and f/2.8 lets in a quarter as much. If you’re dealing in “full stops,” like the ones listed above, every stop will either halve or double the amount of light entering your lens. If your photo is too dark, you can make it brighter by using a wider aperture; too bright, and you can fix it by narrowing it down.

Julia Volk uses a wide aperture of f/1.4 to create a soft, blurry background.
Photo by Julia Volk · View Photo
Changing your aperture, however, will affect more than just your exposure. It’ll also influence your depth of field, or the distance between the closest and farthest objects that appear “acceptably sharp.” You’ll notice, for example, that as you open your aperture, your background and foreground might become blurry.
Shutter speed settings
When you click the button on your camera, a shutter opens to allow light to pass through. The longer your shutter remains open, the more light can enter your camera. That duration is known as shutter speed or exposure time, and it’s measured in seconds or fractions of a second.
Common shutter speeds you’ll encounter include ⅛, 1/15, 1/30, 1/60, 1/125, 1/250, 1/500 of a second, etc. These are pretty straightforward in terms of exposure; 1/125 of a second, for example, lets in twice as much light as 1/250, while 1/500 of a second lets in half as much as 1/250. The slower the shutter speed, the brighter the exposure.

Kehn Hermano uses a long exposure of 30 seconds to create light trails over a bridge.
Photo by KEHN HERMANO · View Photo
As with aperture, adjustments in shutter speed will also affect another aspect of your image—in this case, motion blur. Leaving your shutter open for longer will create a blurring effect, like what you see with star trails and light painting. On the other hand, a lightning-fast shutter speed will freeze motion.

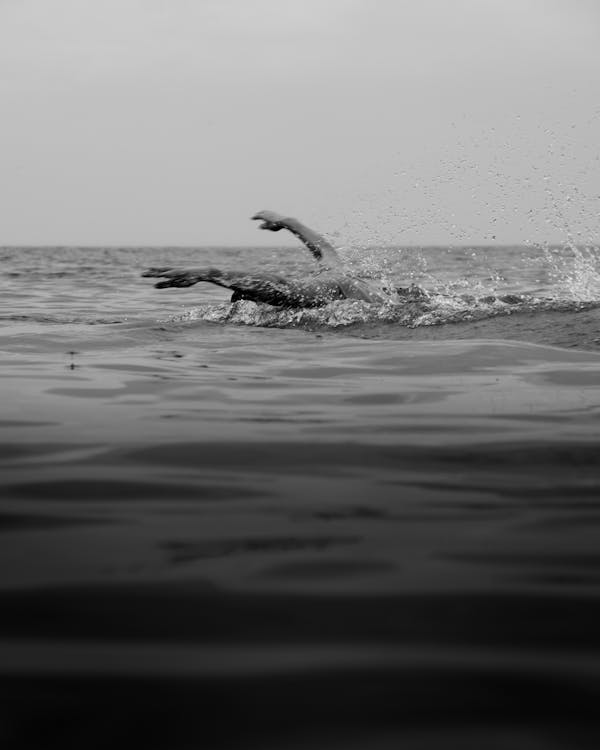
You’d use a fast shutter speed to freeze the movement of a wave, as seen in this picture by Kammeran Gonzalez-Keola.
Photo by Kammeran Gonzalez-Keola · View Photo
ISO settings
ISO represents the final corner of the exposure triangle, and while it doesn’t affect the amount of light entering your camera, it will influence the brightness or darkness of your photo. Back in the days of film, ISO was used to describe your film’s sensitivity to light; the higher the ISO, the more sensitive the film.
For simplicity’s sake, a similar system was developed when we moved over to digital cameras. Normal ranges for digital cameras today are around 200 to 1600, though some cameras can go lower and much higher.
Bumping up your ISO will brighten your exposure, so it can be a life-saver in low light, especially when you want to keep a wide depth of field and eliminate motion blur, but it also comes with the cost of digital noise. For that reason, most photographers like to keep their ISO as low as possible and adjust as needed.
Taking advantage of your camera
DSLRs, or digital single-lens reflex cameras, are some of the best and most popular cameras for photographers of all levels, ranging from entry-level to professional, but it can take a while to understand all the features these cameras have to offer.
In this section, we cover just a few key controls you need to know to get the most out of your camera. If you’re in the market for a DSLR, we recommend the Canon Rebel SL3, the Nikon D3500, or the Pentax K-70 for beginners.

A portrait by Sharon McCutcheon, made using the Canon EOS 5D Mark II DSLR camera, set at aperture f/2.8 and ISO 250, with a lens focal length of 100mm.
Photo by Alexander Grey · View Photo
Shooting modes
DSLR shooting modes tie directly back to our settings for controlling light: aperture, shutter speed, and ISO. Each offers varying control over your settings, depending on what you want. In Auto mode, your camera chooses every setting for you, without your input. This can work well if you’re struggling to get a good exposure, but it also limits your creative control.
One step up from Auto is Program mode, which lets you control the ISO, while your camera sets the aperture and shutter speed. Two of the most important and useful modes you can use, however, are Aperture Priority and Shutter Priority. The first lets you set the aperture, and therefore determine the depth of field, and then chooses an appropriate shutter speed to match. The second does the opposite; you set the shutter speed, and your camera selects an aperture.
Finally, Manual mode gives you full control over your exposure settings. You set the ISO, aperture, and shutter speed based on the look you want; at the same time, you’re on your own when it comes to exposure. With some practice—and an understanding of how these elements work—you’ll get better at adjusting your settings to suit your needs.
A breathtaking landscape, captured by Tatiana using the Nikon D60 camera, set at f/10.0, 1/400 seconds, and ISO 800, with a focal length of 44mm.
Photo by Tiana · View Photo
Metering modes
Metering modes are essential because they describe how your camera determines a proper exposure in the first place. Most cameras will default to Evaluative or Matrix mode, which works by taking an average reading across the entire frame. It factors in the highlights, shadows, and everything in between.
Evaluative mode will work well in most situations with even lighting, but it can struggle with high contrast settings, like a silhouette or spotlight photo. In that case, you can switch to center-weighted mode, which instead calculates exposure based mostly on the center of your frame.
Alternatively, you might opt for spot-metering mode, which allows you to set a specific point in the frame and tell your camera to determine the correct exposure based on that spot only, while ignoring the rest.

Rachel Claire exposes for the highlights to create crisp, clear silhouettes.
Photo by Rachel Claire · View Photo
Your histogram
Your histogram is a visual representation of the tonal distribution of your image, including the shadows (on the left), the mid-tones (in the middle), and the highlights (on the right). With a “perfectly” exposed image, you’ll usually see a nice balanced “mountain,” running edge-to-edge and showing a range of tones and even distribution. If you’re overexposing, you’ll see the graph squished to the right; an underexposed photo will push the histogram to the left. Glancing at your histogram can be a quick and easy way of visualizing your exposure when you’re in the field.
Vitória Santos uses the EOS Rebel T6 DSLR camera, plus a standard 50mm lens, to create this evocative portrait.
Photo by Vitória Santos · View Photo
Focal length
Focal length is the characteristic of your camera lens that determines your angle of view. A prime lens has a fixed focal length, while a zoom has variable focal lengths. Some common prime lenses you can expect to find include a 24mm, 35mm, 50mm (called the “nifty fifty”), 85mm, 200mm, etc.
The shorter the focal length of your lens, the wider your angle of view. For example, a wide-angle lens like a 24mm will provide a much broader view of the same scene than a standard 50mm lens. Conversely, a 200mm lens would create a closer crop than the 50mm would, while also magnifying the subject. Longer focal lengths are usually used for faraway subjects, like wildlife, while shorter focal lengths are popular for interiors, where you need a wider angle of view.
Editing your photos
Photo editing has been around since cameras were invented. For a long time, old-fashioned “retouching desks” were used to edit negatives directly. It was a labor-intensive process, involving the use of etching knives, scissors, paintbrushes, ink, graphite, chalk, and even scraps of cotton to manually manipulate an image. Unfortunately, there were no shortcuts in those early days.

A timeless black and white portrait by Anastasia Shuraeva, edited in Lightroom.
Photo by Anastasia Shuraeva · View Photo
In the intervening decades, of course, the global photo editing industry has grown in size and influence. With a little practice, today’s photographers are able to enhance their images in post-production in seconds—no more hand-painting necessary—and they can get just about any look they want.
From the teal and orange look to classic monochrome, the last few years have brought with them an array of photo editing trends, including hugely popular ones like “light and airy” and “dark and moody” edits. Here’s what you need to know.
Software & apps
These days, there’s an app to suit just about every niche and budget, from advanced professional tools like Adobe Photoshop to free options like GIMP and everything in between. As software like Luminar by Skylum and ACDSee Photo Studio Ultimate continue to evolve and roll out impressive, AI-powered features, creative editing apps like Polarr and VSCO are making photography more accessible to everyone, regardless of experience level.
While there’s no shortage of options, we recommend starting with Adobe Photoshop Lightroom Classic for a few reasons. It’s powerful and can do a lot, but it’s also accessible and easy to use. On top of that, Lightroom doubles as an asset management tool, so it’s great for keeping your workflow organized.
Crop and composition
While it’s always good to aim for a “perfect” in-camera shot, most photos can benefit from a critical eye and some tweaks to composition: even master photographers like Robert Frank often cropped their images after the fact. Lightroom has optional grid overlays (including one for the rule of thirds) to help guide your composition choices. Sometimes, all it takes to elevate a photo from average to great is a clever crop.
Light
Most of the edits you make in Lightroom will fall into two categories: light and color. When we talk about light, we’re talking about exposure. You can start to finesse your exposure up in Lightroom’s Basic panel by using your Exposure, Highlights, Shadows, Whites, and Blacks, but the true magic usually comes to play in the Tone Curve. It’s here that you can make detailed, advanced edits to your shadows, mid-tones, and highlights. Many photographers like to create a subtle ‘S’ curve here for a nice contrast.

Mika Borgia emphasizes the bold yellow jacket in this image with subtle editing.
Photo by Mika Borgia · View Photo
Basic color correction
You’ll start to correct your colors in the Basics panel, where you can edit your white balance using the Temp and Tint sliders. An even quicker fix would be to take your white balance dropper and click on a part of your image that’s true white or gray. Lightroom generally does a good job of removing color cast that way, though it depends on the image.
As you go down the panels in your Develop module, you can further perfect your colors in the HSL/Color panel. This is where you’ll be able to change the hue, saturation, and luminance of specific colors to suit your taste.

Aleksandar Pasaric uses moments of symmetry and the rule of thirds when capturing vertical living in the metropolis of Hong Kong.
Photo by Aleksandar Pasaric · View Photo
Practicing and breaking the rules
Of course, these tips are only useful if they’re put into practice. But if you don’t have the latest DSLR, don’t let that stop you. Keep shooting and experimenting with exposure, composition, and editing. “I always say the best camera for a beginner is the one they feel most comfortable with and are willing to keep ready to hand,” Kim Beil, the author of Good Pictures, tells us. “Your camera does you no good if it’s still in the bag or locked in a closet.”

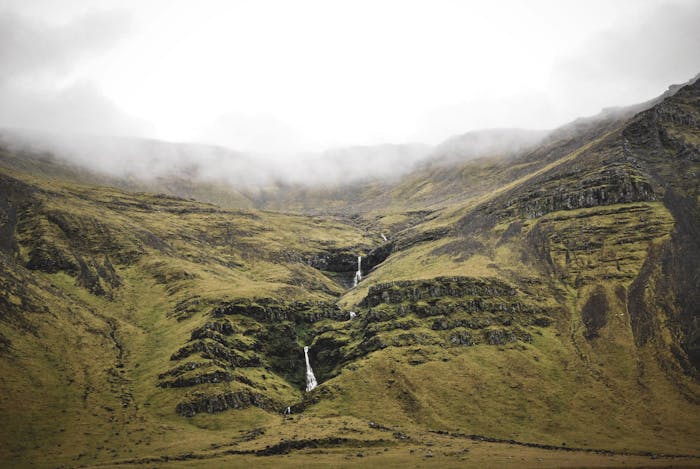
Eberhard Grossgasteiger uses depth and the rule of thirds to create an unforgettable composition.
Photo by eberhard grossgasteiger · View Photo
When discussing photography, we sometimes talk about “rules,” but the truth is that these are just tools. Use them when you want to, and adapt them to suit your needs. “My research emphasizes how rapidly rules have changed throughout the history of photography, so I am always reluctant to set any rules myself,” Beil reminds us. “But, I think beginning photographers will be more satisfied with their work if they pay attention to the fact that they are deliberately making pictures—not just copying what they see in the world.”
Learn as much as you can, and as you hone your vision, learn to trust your inner voice.
Pexels is a platform for high quality stock photos you can use for free.
Browse free photos